
How To DIY Pet Food Bowls
**This post contains affiliate links for your convenience. I may earn a small commission if you make a purchase from these links.**
I'm excited to share with you a unique project that combines the joy of crafting with my passion for thrifting: DIY pet food bowls.
Picture this: beautiful vintage blue and white china bowls, once treasures tucked away in a Goodwill aisle, now transformed into dining pieces for your beloved furry friends. The best part? They blend in with the rest of your home decor!
As a pet owner myself, I've always sought ways to add personality to my pet's accessories while staying mindful of budget and sustainability. So when I stumbled upon these vintage pieces during a thrifting adventure, inspiration struck instantly.
Keep reading to create your own!
In this blog, I will show you How To DIY Pet Food Bowls

Below is a list of the items you will need to recreate this project:
Thrifted Blue & White Lennox China Bowls
Round Wood Pedestal Pieces
Hot Glue Gun
*Product can be purchased directly through my website [www.juliesdesignsandsigns.com]
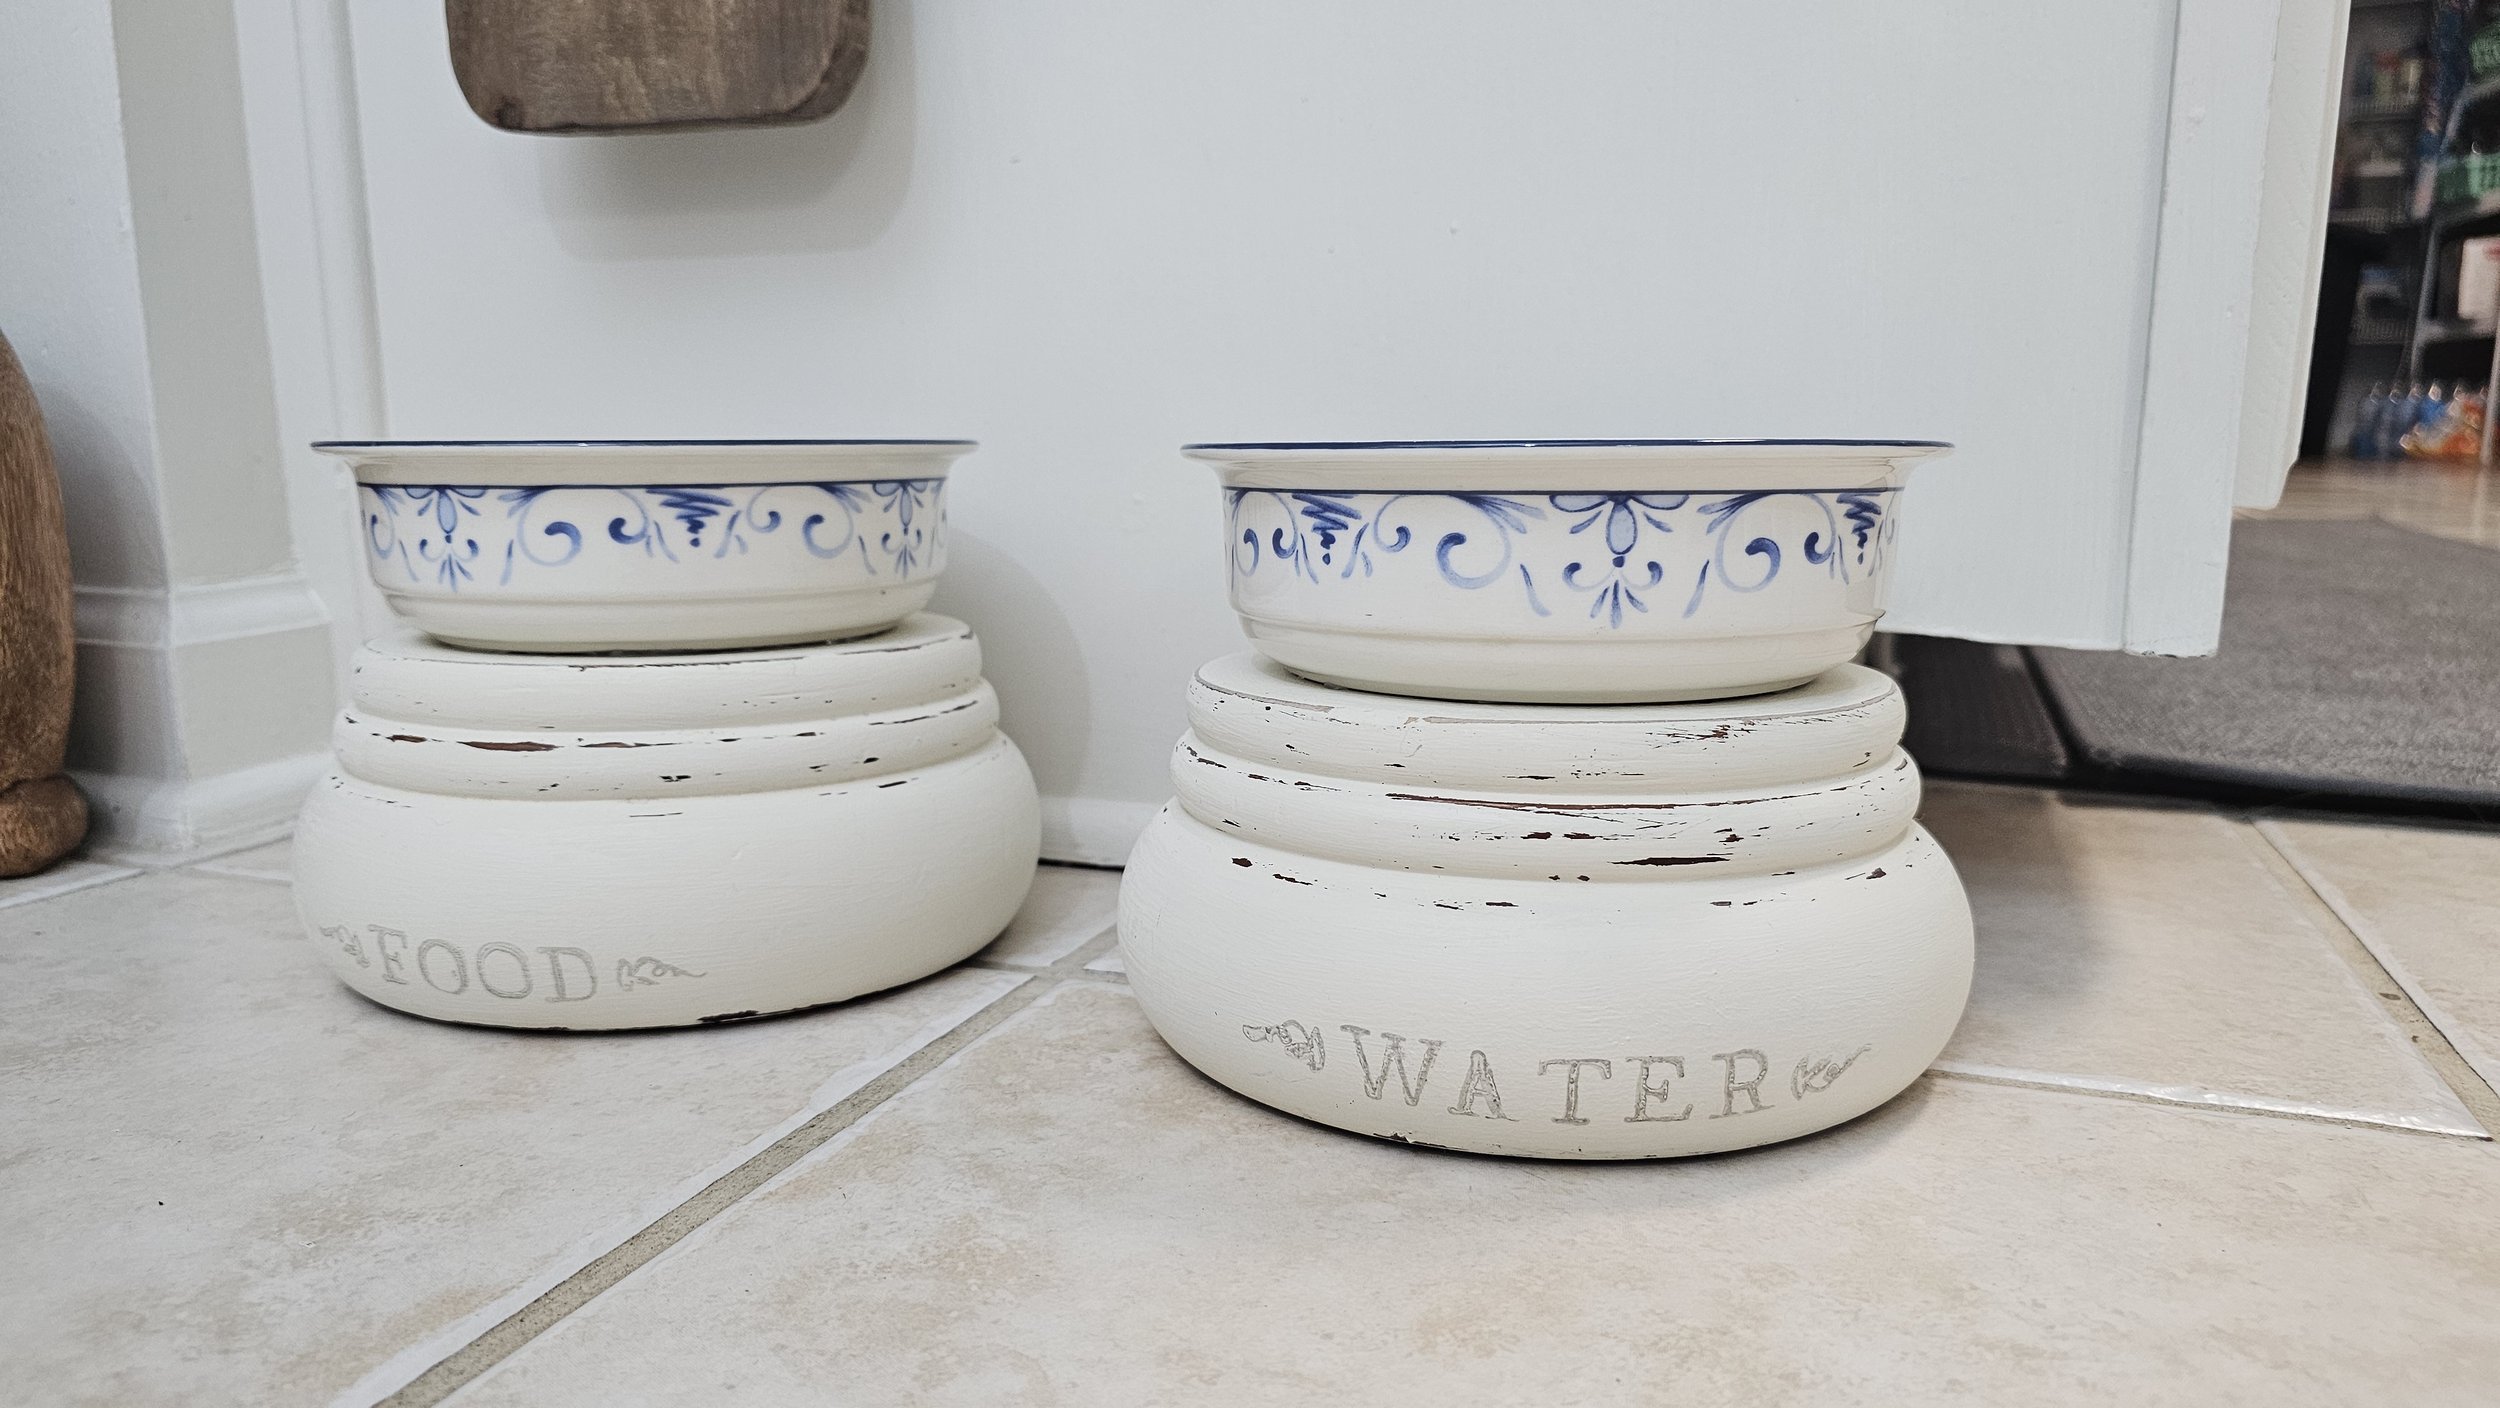
I found a set of blue and white Lenox Chinastone pieces at my local Goodwill.
Once I brought them home, I knew exactly what to do with two of the bowls; DIY new food bowls for our cat!

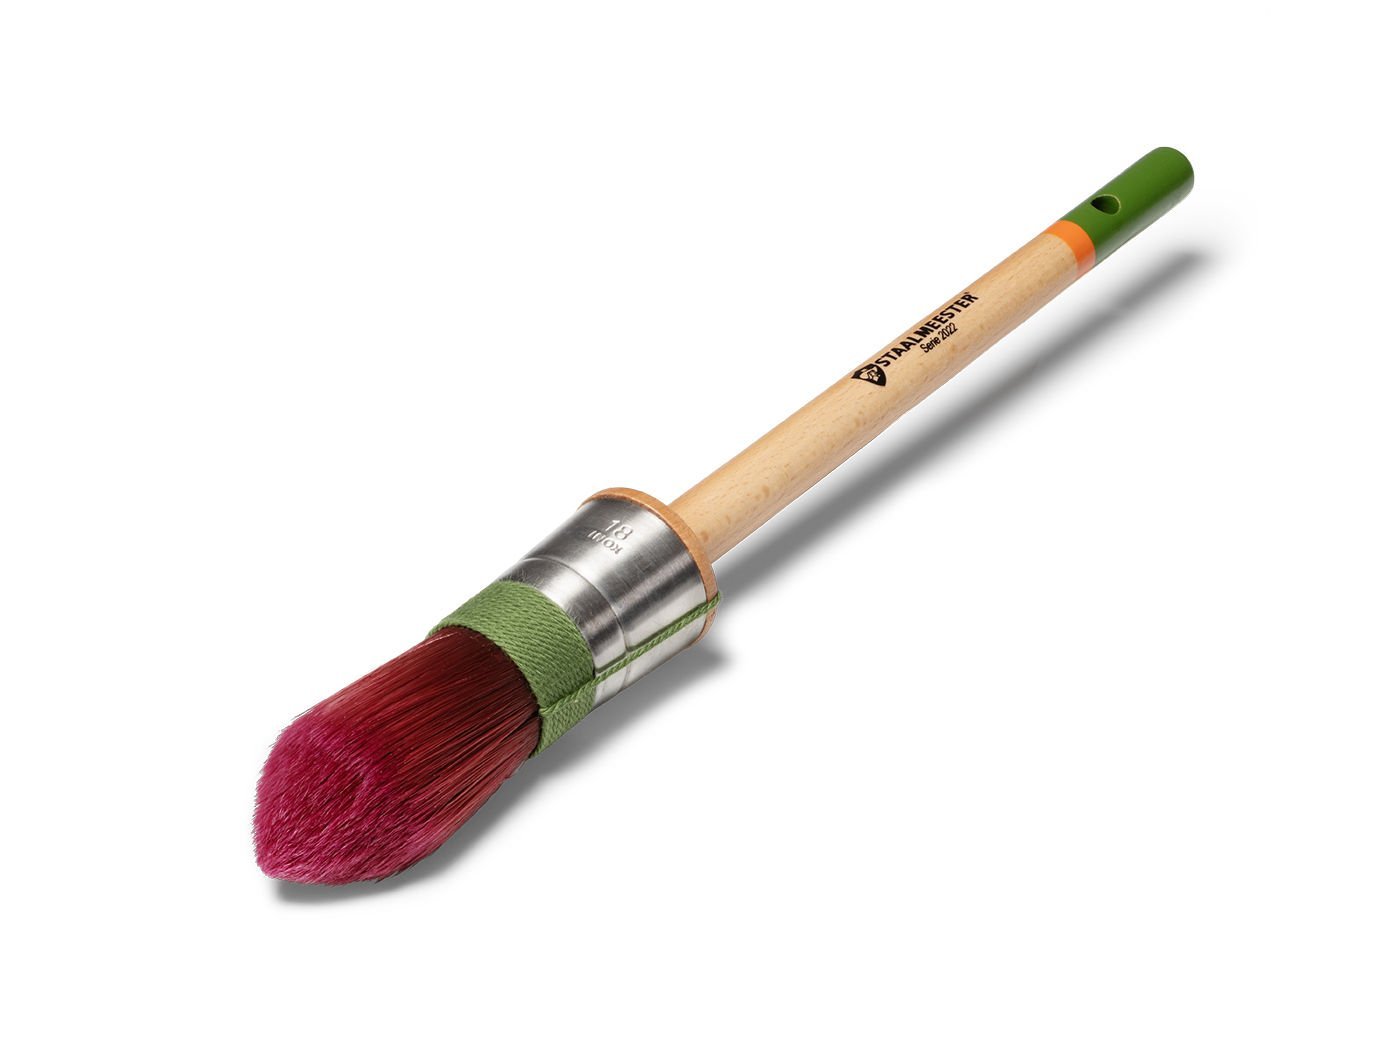
I started by painting (2) wood round pedestals with a STAALMEESTER Pointed Sash Brush and Fusion All In One paint in the color Raw Silk.


I applied 1 coat of paint to the entire wood pedestal.
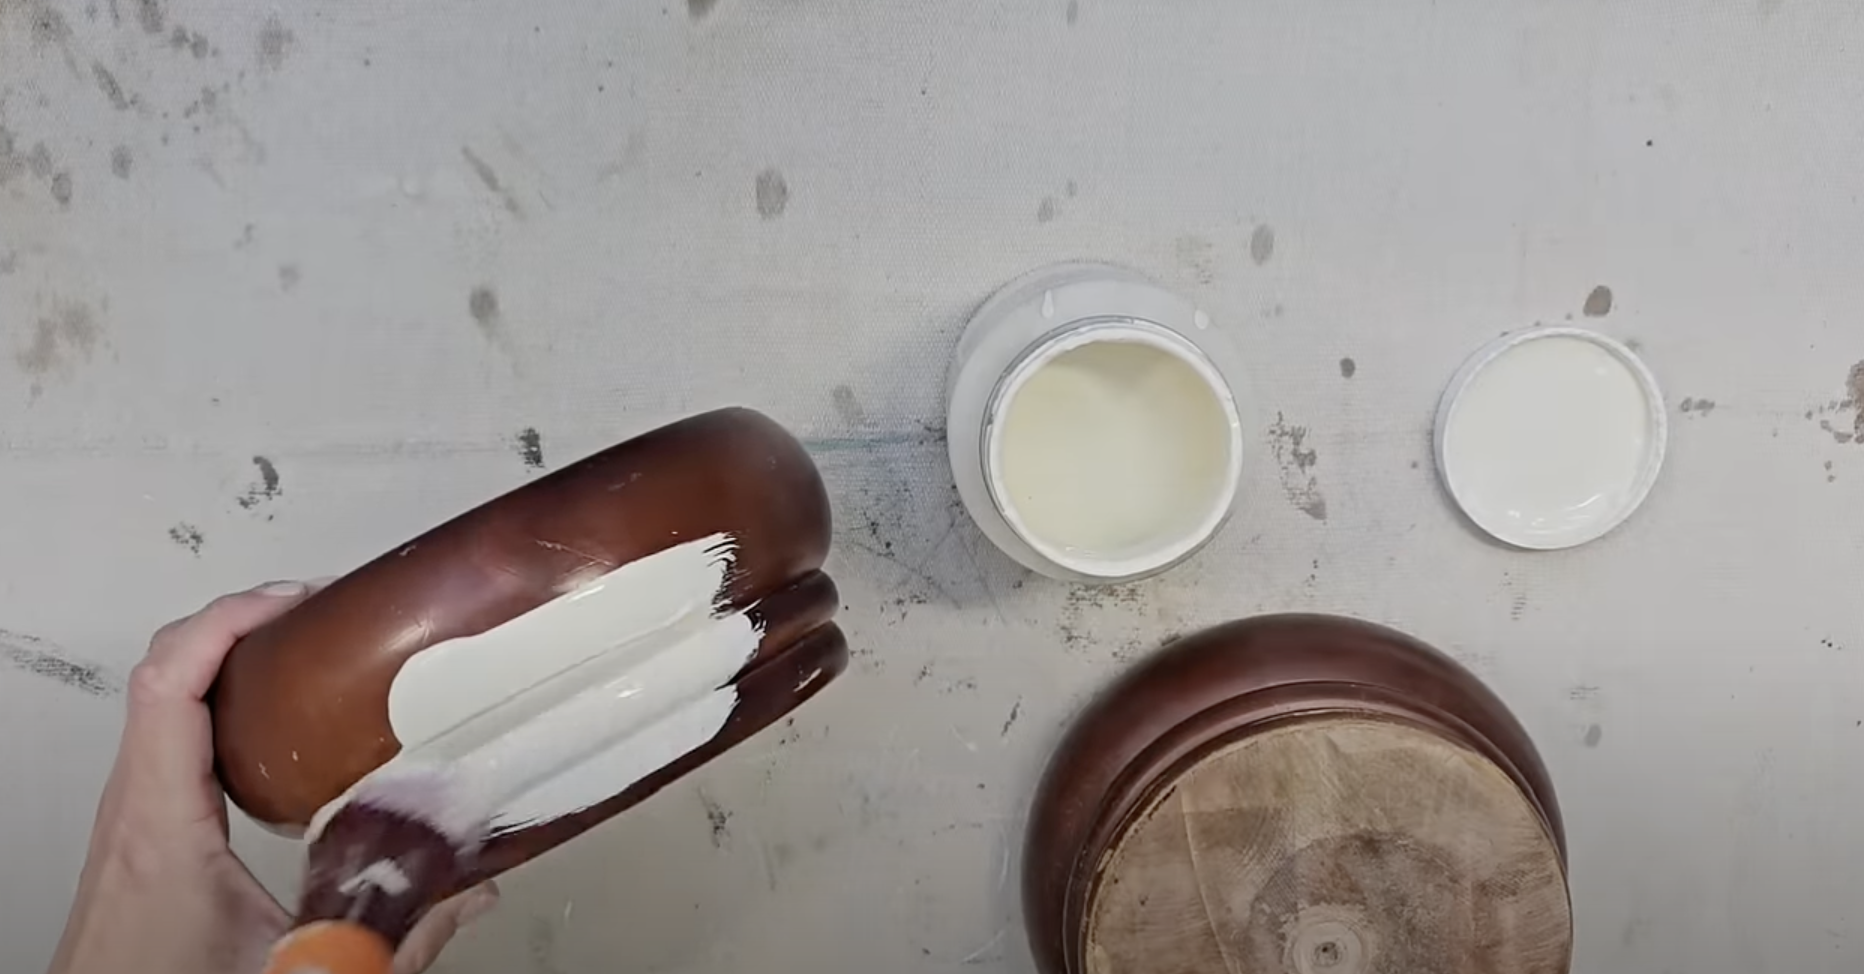
I decided that I did wanted mine to have a little bit of an aged look so I used sand paper to lightly distress the edges.
Fusion Paint does have a built in sealer so if you like the full painted look - you do not have to distress.


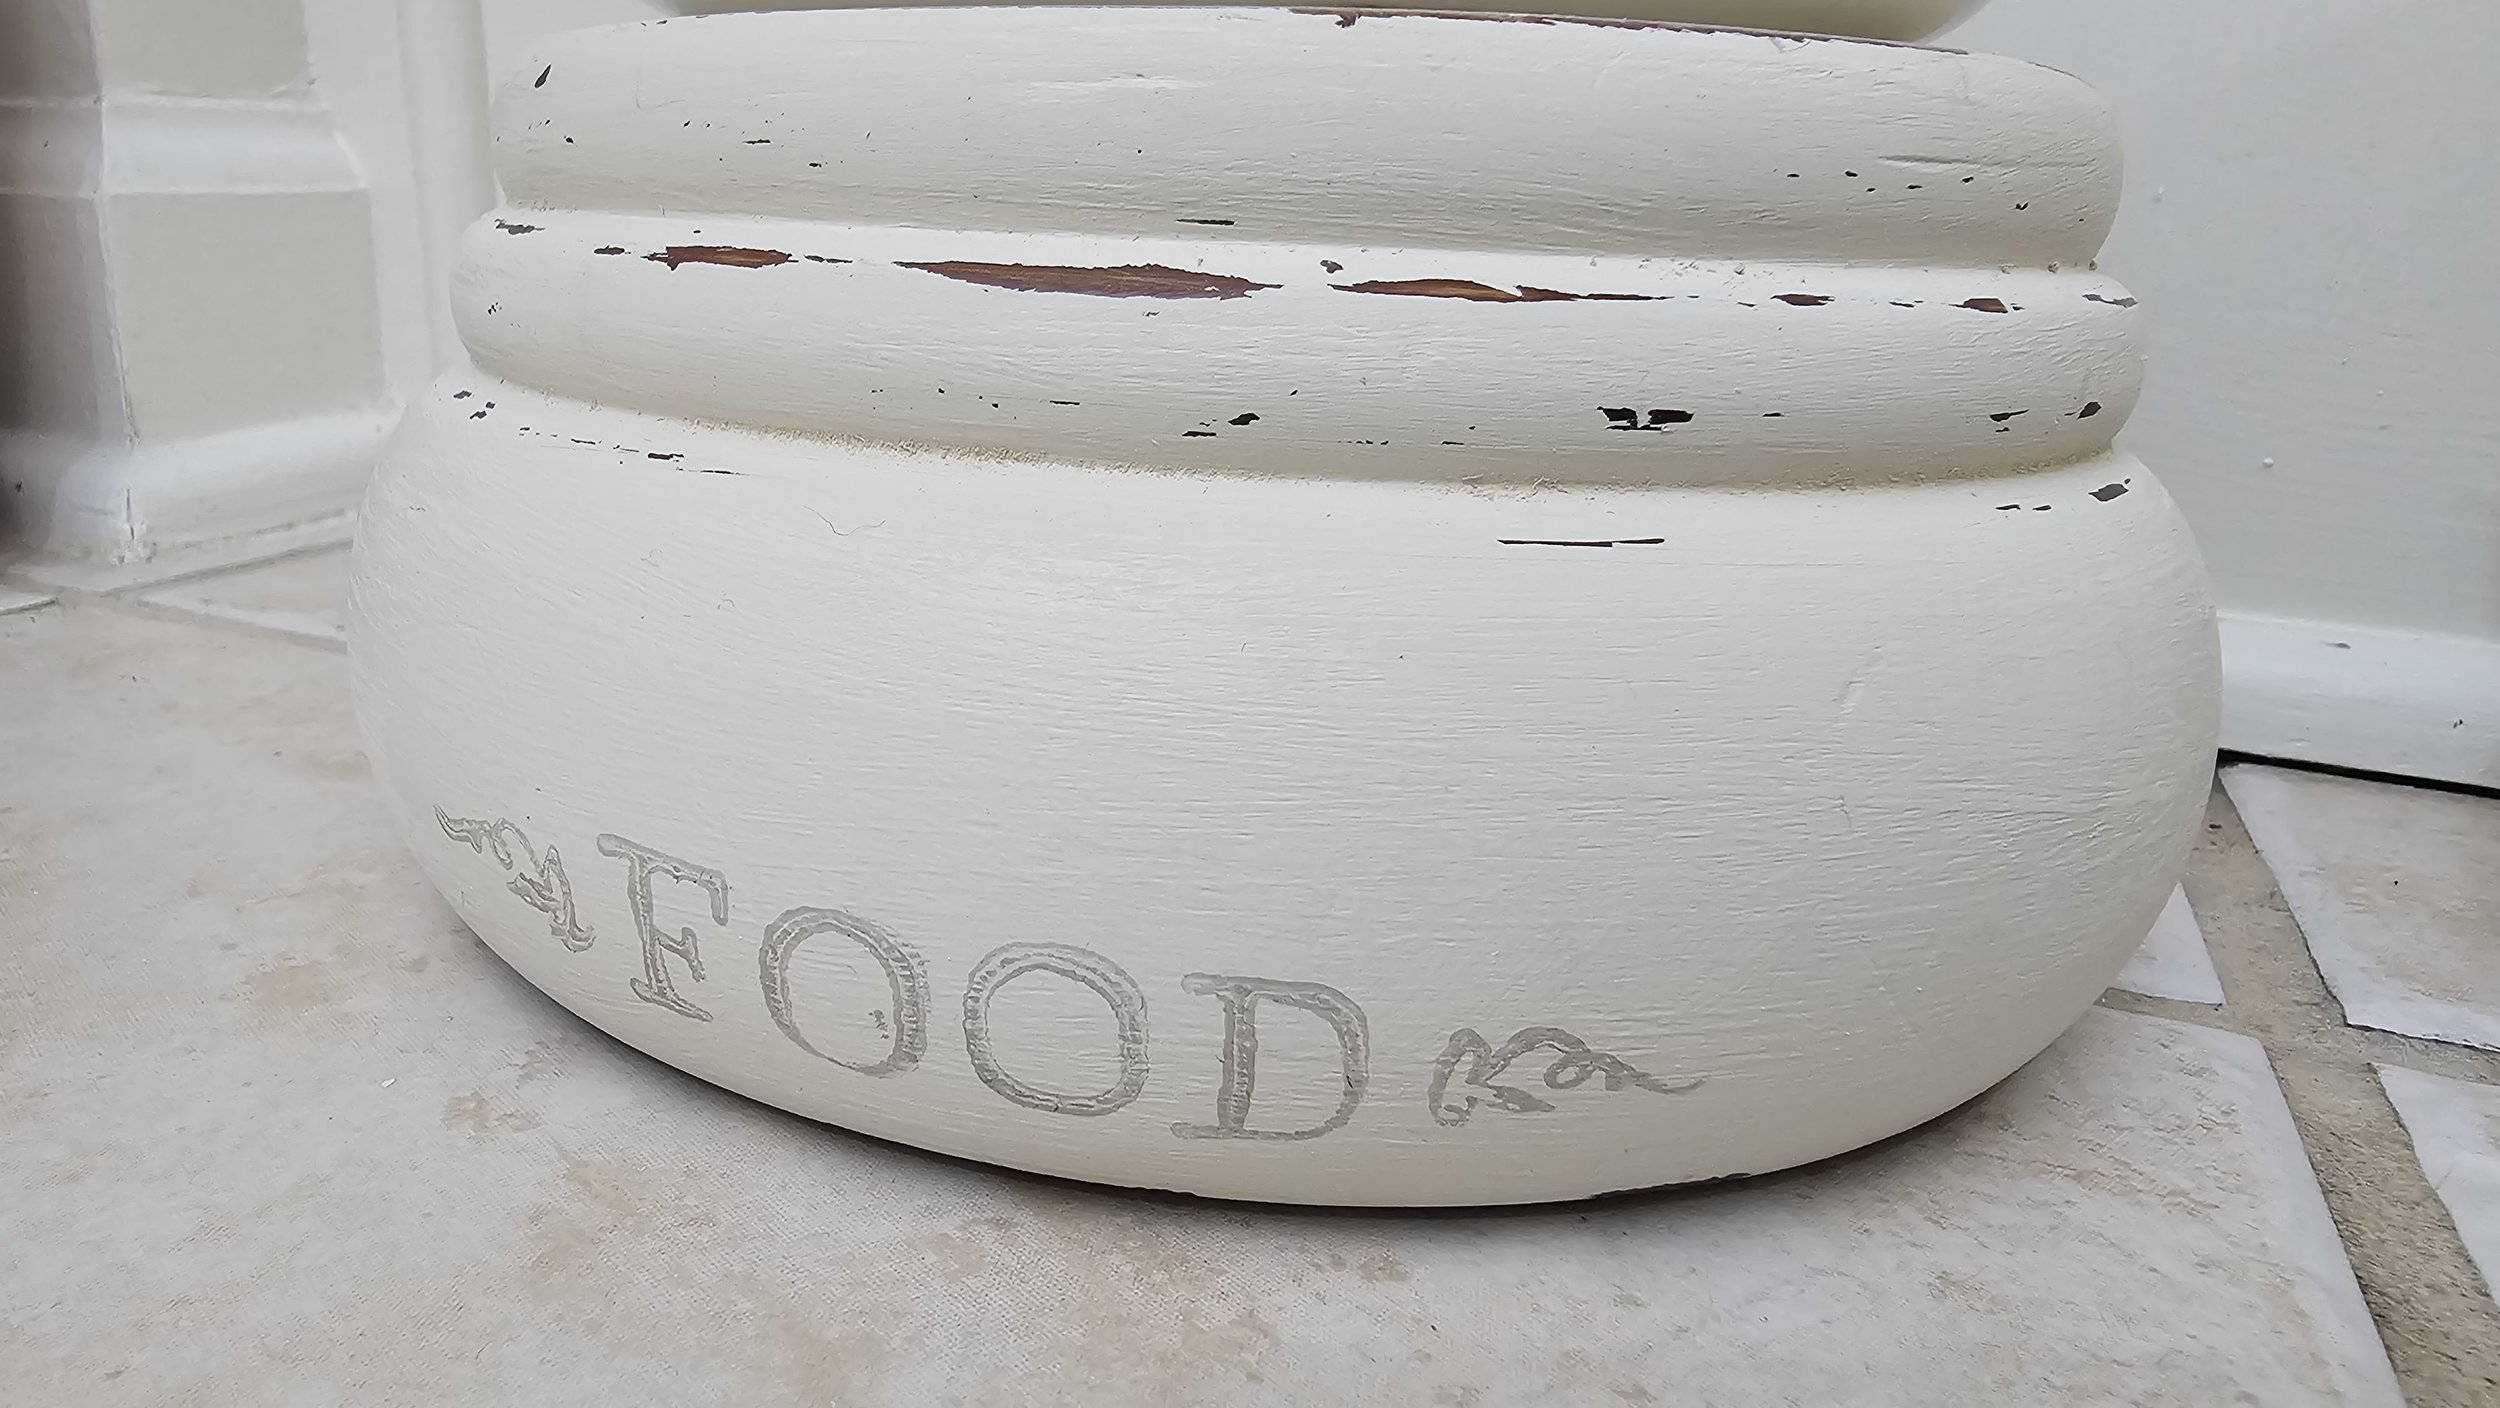
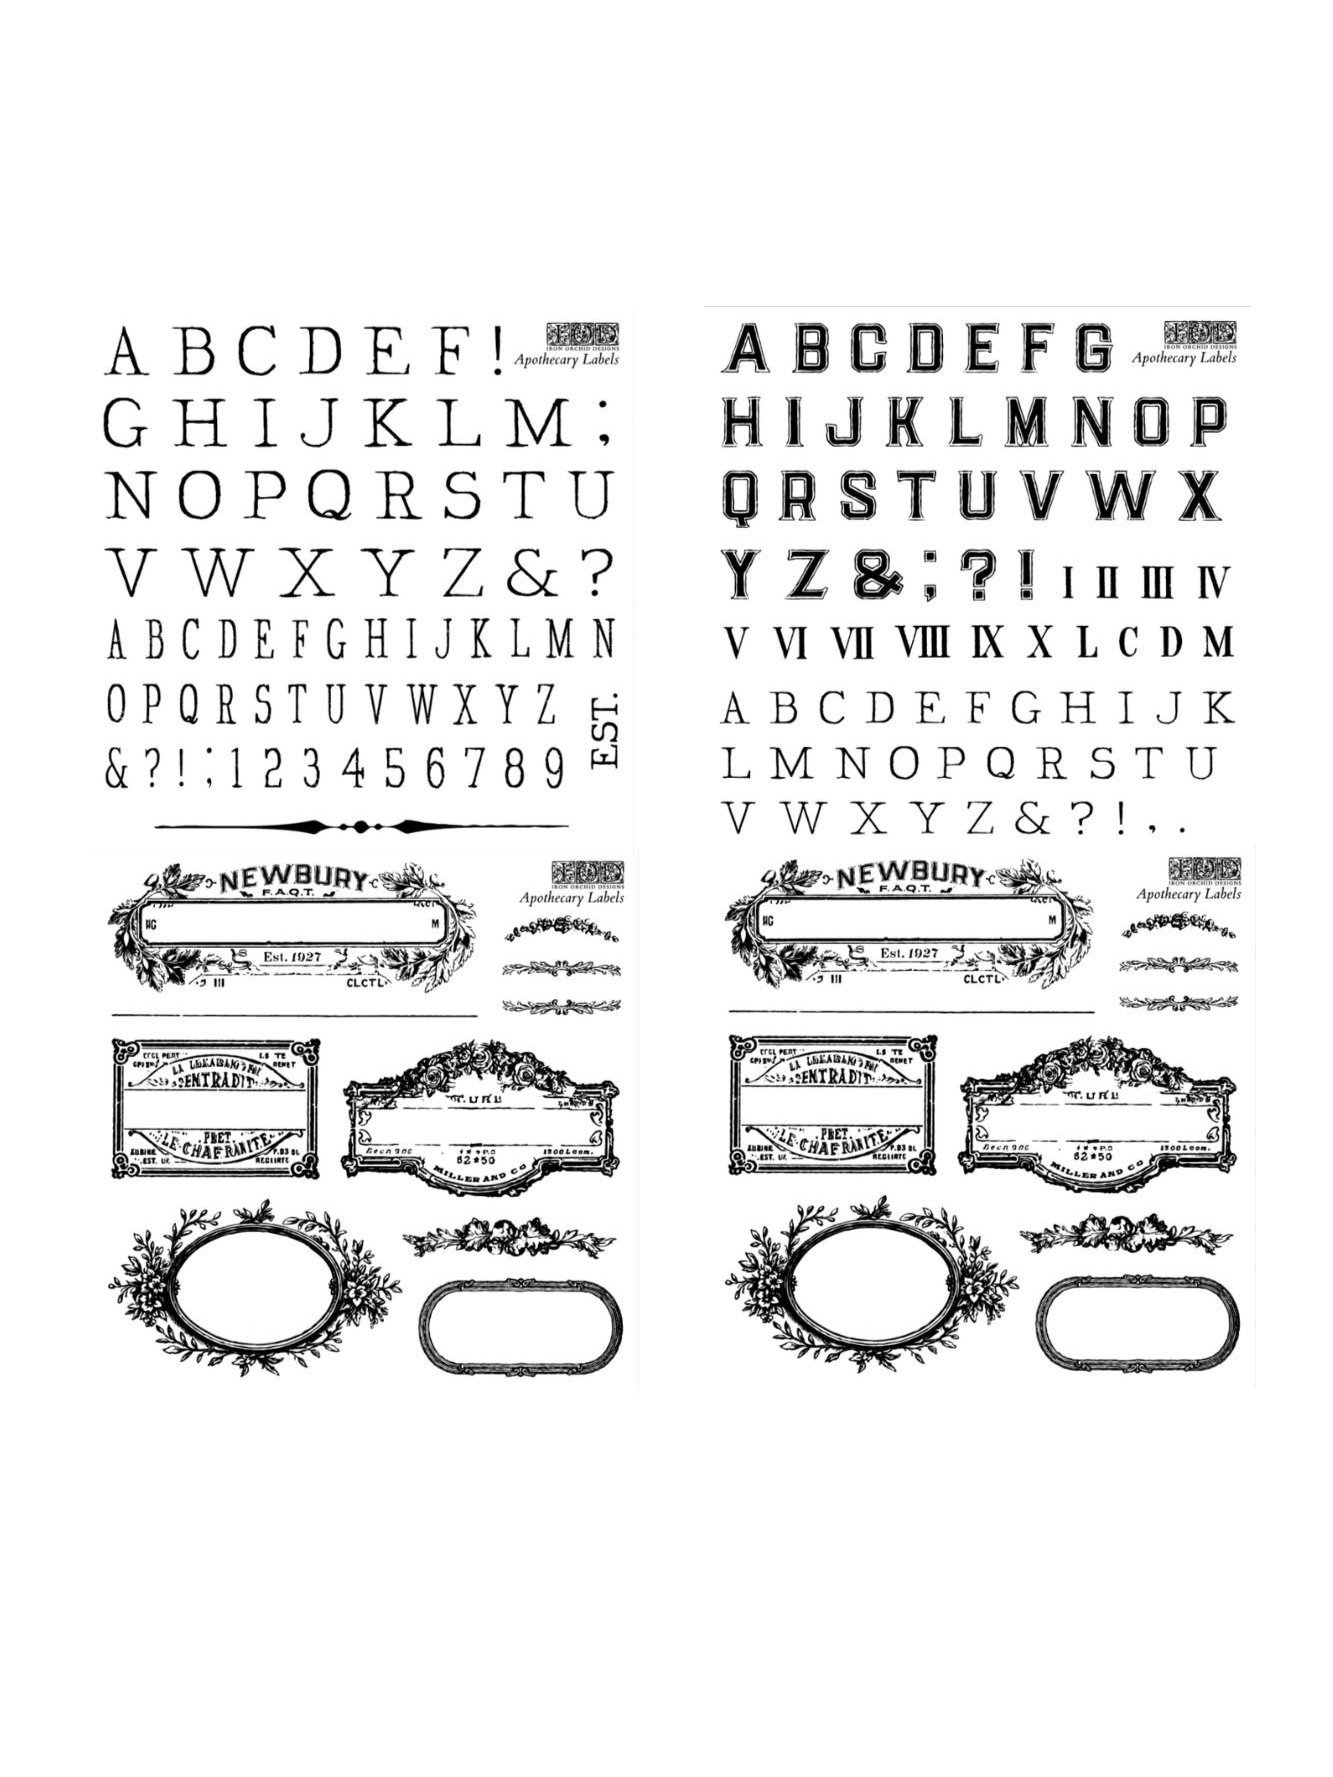
Next, I used the IOD Stamp Collection - Apothecary Labels to add words on the side of the wooden pedestals.


To personalize the pet food bowls, I chose to spell out "WATER" and "FOOD."
I arranged the letters to form each word, ensuring they were evenly spaced.
To add an extra touch, I decided to use the Alphabellies Stamp Collection, which includes charming floral embellishment stamps. I positioned these stamps along the sides of the words for some added flair.

Next, I gently pressed my thin mount into the letters to lift them up for stamping.


Then, I used IOD Stone Gray Ink and an Ink Pad to ink up my stamps.

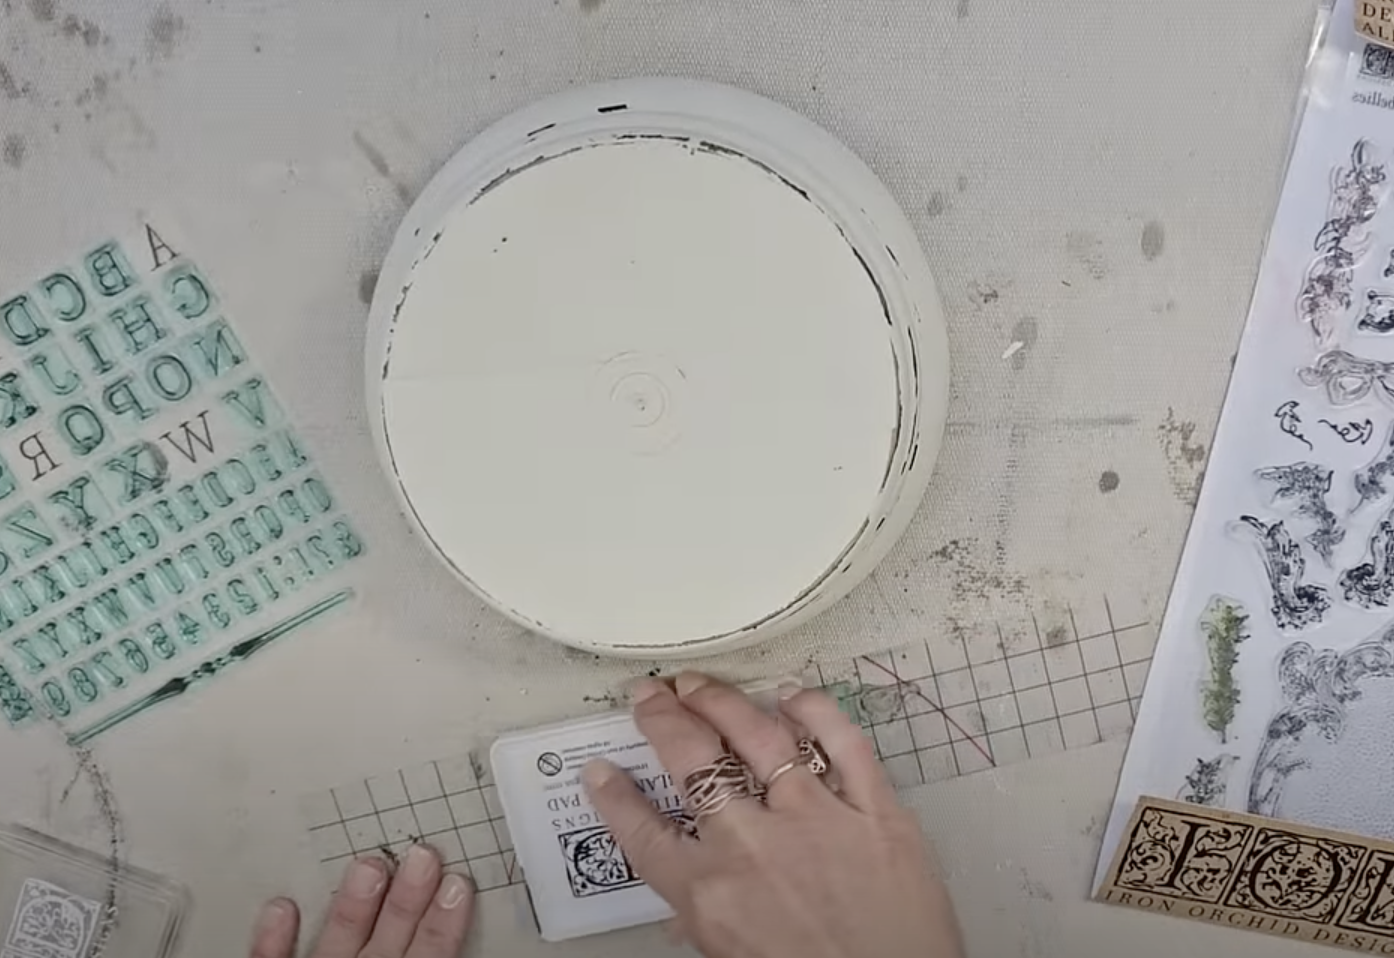
Stamping around a curved surface can be tricky, so using both hands is essential.
Carefully and slowly, I press the stamp from one side to the other.

How cute is that? I also created one that says food.


The final step is to attach the bowls to the pedestals.

I wanted the flexibility to remove them later, but I didn't want them sliding around, so I secured them in place with a hot glue gun.

Once I applied the hot glue to the underside of the bowl, I firmly pressed them into the pedestals.

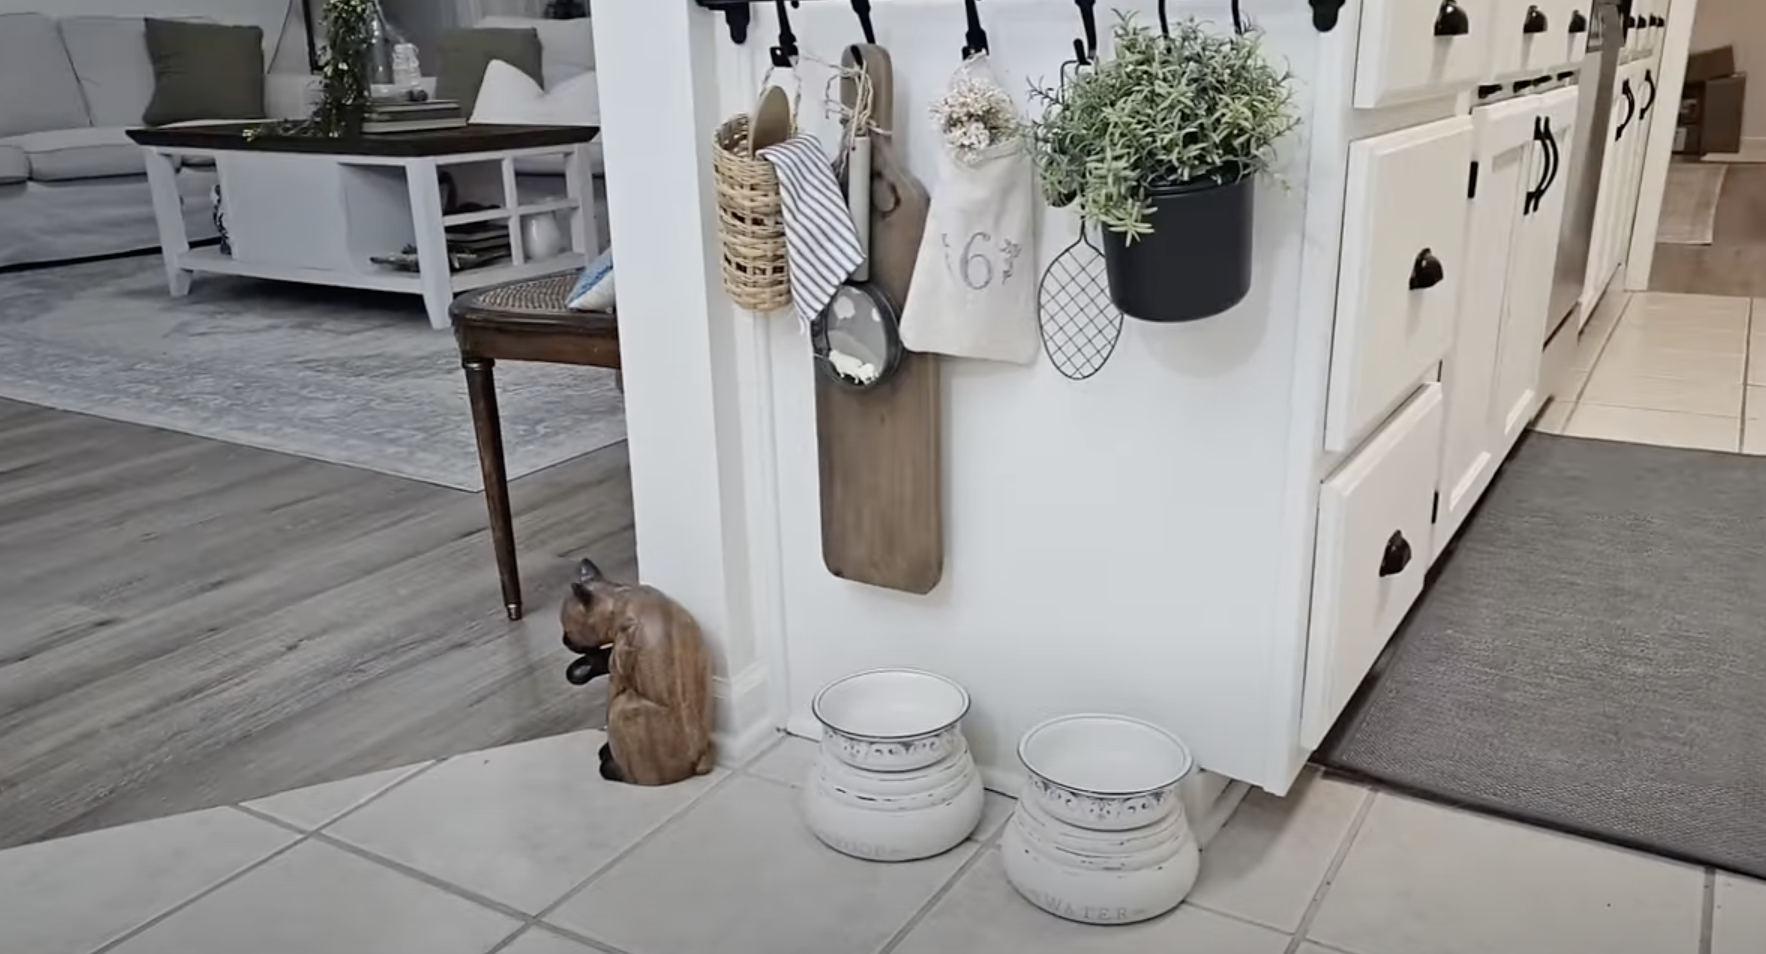
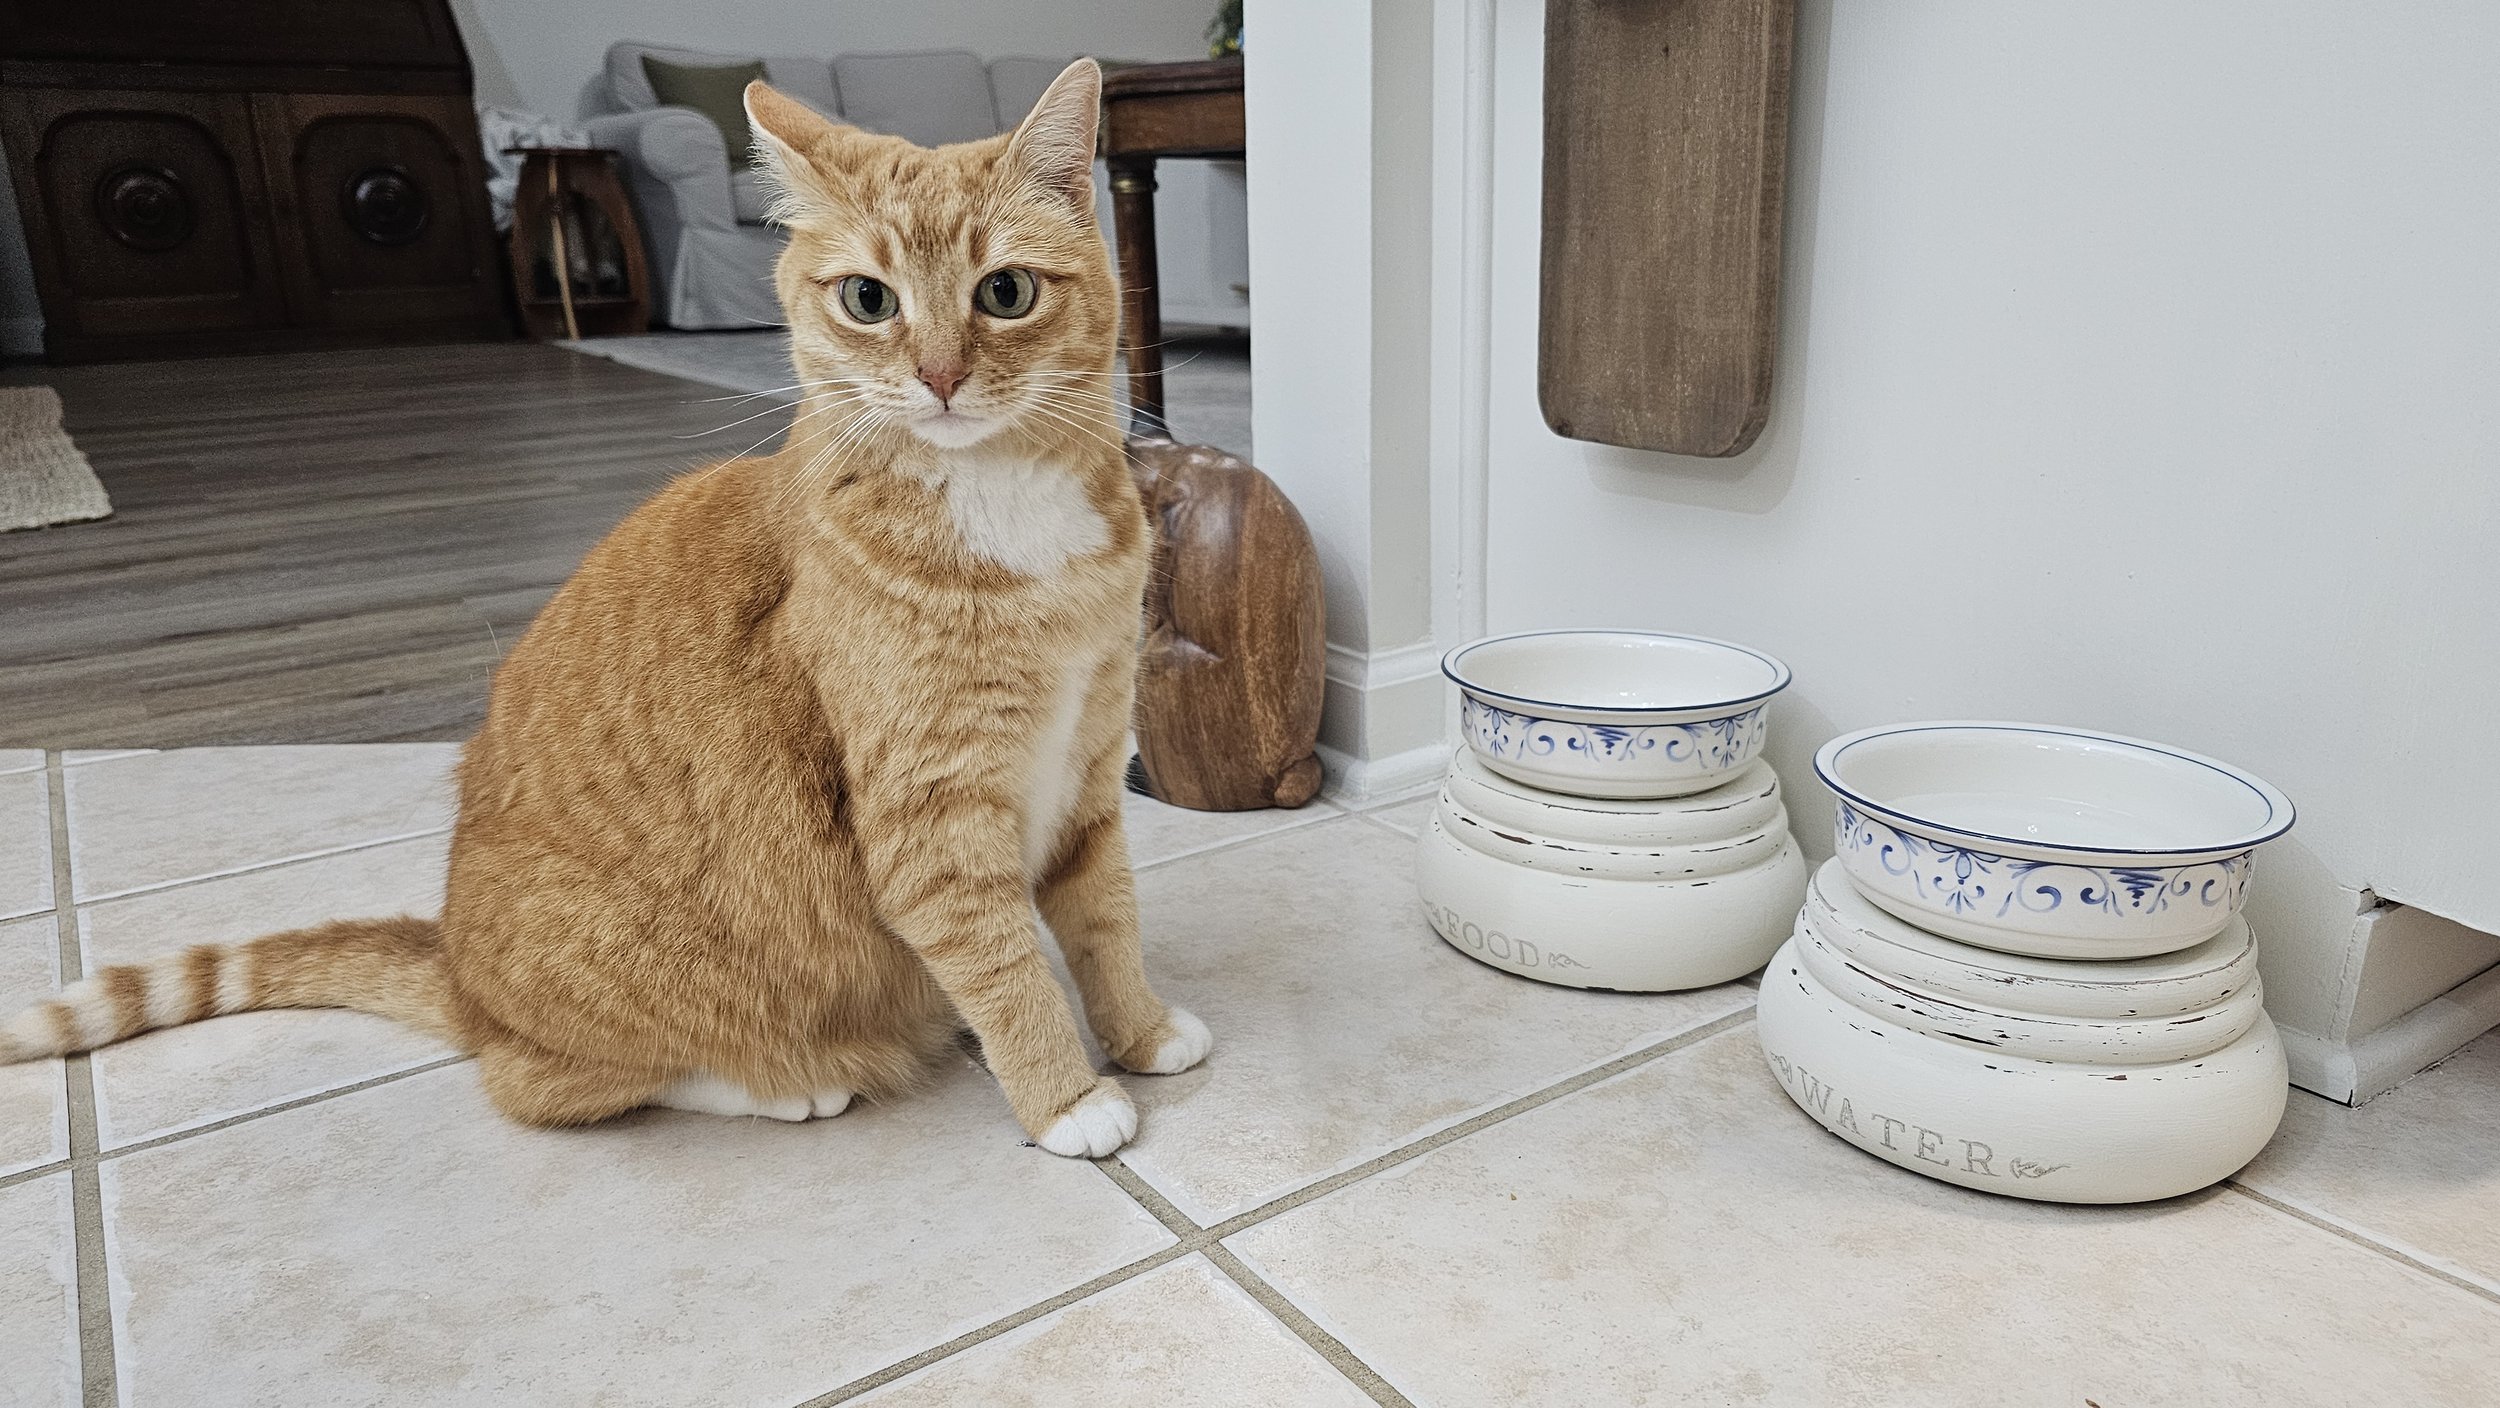
And that’s it! These DIY pet food bowls turned out SO good.
They blend in with my farmhouse home decor so well!
Are you ready to create your own? Be sure to share a photo and tag me on social media [@juliesdesignsandsigns] so I can see what you create.
This blog is all about How To DIY Pet Food Bowls
Click Image To Shop
What Is The Colors Of The Month Club?
Don’t forget to join the Colors of the Month Club to receive (4) sample Fusion Paint colors I picked that are perfect for the current season! → Click here to learn more
Like what you see? Be sure to join our mailing list for weekly DIY Ideas, thrift flips, new product alerts, video announcements, live events & more!
DISCLAIMER: This blog post may contain affiliate links. If you purchase a product or service with the links provided I may receive a small commission. There is no additional cost to you. Thank you for supporting my blog so I can continue to provide you with free content each week!


Transforming Your Thrift Store Finds Into High End Decor With The New Spring IOD Stamps and Moulds